Custom Pipelines
Introduction To Pipelines
BizTalk is a message-based system receiving and sending data inside messages. Sometimes the incoming and outgoing messages must be processed to fit to external formats. Pipelines, attached to send ports and receive locations, are the components through which the messages pass, then the data format is recognized and can be validated or changed if necessary; as well as the metadata is extracted and added to the message context.
Receive and send pipelines in BizTalk are used to perform a range of processing and operations on messages. Some of them are listed below
1) Encrypt and decrypt messages
2) Sign and verify digitally signed messages
3) Validate message against schema.
4) Deal with promoted properties used for content based routing.
5) Disassemble or break single message into multiple.
6) Wrap messages with header and footer
This post contains the Steps to create the custom Pipelines.
A pipeline component is a .NET or COM component that implements a set of predefined interfaces for interaction with the BizTalk Messaging Engine. Depending on the functionality of the component, different interfaces must be implemented.
Every pipeline component must support the IPipelineComponent interface. Without this interface, a Commerce Server pipeline will not be able to execute the component. The remaining interfaces are optional. They expose various types of functionality that allow new components to fit smoothly into the Commerce Server architecture.
The following table lists the required IPipelineComponent interface and the other optional interfaces.
Interface
|
Description
|
Executes the component.
This interface is required.
| |
Sets and retrieves the properties on a component using a Dictionary object.
This interface is optional.
| |
Uses a SAFEARRAY to identify the OrderForm object and PipeContext object elements that a component reads and writes.
This interface is optional.
| |
Displays a dialog box for configuring a pipeline component.
This interface is optional.
| |
Determines the object that will be invoked through the IPipelineComponentUI interface to display the dialog box for the component.
This interface is optional.
| |
Indicates that the object supports property pages.
This is a standard OLE interface. This interface is optional.
| |
Persists the data associated with an object to a stream. This is the form of persistence used in the Active Template Library (ATL) Pipeline Wizard.
This is a standard OLE interface. This interface is optional.
| |
Persists the data associated with an object to a Dictionary object.
This is a generic persistence interface defined by Commerce Server. This interface is optional.
|
Steps Creating Custom Pipeline:
From the Link http://btsplcw.codeplex.com/, you can download the Biztalk Server Pipeline Component Wizard. [Simplifies our Process].
Steps to Build the Pipeline Wizard
- Open the PipeLineComponentWizard.sln [Downloaded, ensure that you have downloaded the correct version what you use, i.e., for VS 2008 or VS 2010].
- Build PipelineComponentWizard.sln and navigate to PipelineComponentWizard Setup Folder.
- We can find the setup.exe and PipelineComponentWizard Setup.msi in the Debug/Release Folder.
- Just Run the Setup.exe.


Steps Creating the Receive Pipeline Using the Wizard
- Create a new Biztalk Server Pipeline Component as shown below using the above component

- In this step, we need to specify the Classname, namespace, and component type sand the language we are gona implement the pipeline.
- We can choose Send/Receive/Any pipeline according to our Design. In this we choose Receive.
- If we choose Receive, we can decode, disassemble, validate, party resolver or any.
- If we choose Send, we can Encode, Assemble, or any.
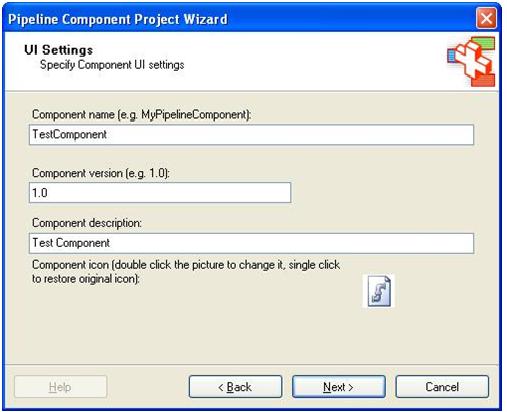
- Next we must set the UI Settings [ Pipeline Component Appearance settings in Biztalk appln]
- We need to provide version, Component name, description and Icon.

4. Next we need to specify the variable name that the pipeline component will use.

5. Finish Creating the Pipeline Skeleton:

6 The Thing we need to do is to apply our logic.
a. As this sample is Receive we selected the Decode
b. WE need to apply our logic over here.[TODO]
public Microsoft.Biztalk.Message.Interop.IBaseMessage
Execute(Microsoft.BizTalk.Component.Interop.IPipelineContext pc,
Microsoft.BizTalk.Message.Interop.IBaseMessage inmsg)
{
//
// TODO: implement component logic
//
// this way, it's a passthrough pipeline component
return inmsg;
}
7) Same process to create the Send Pipeline also.
Sample Send Pipeline Logic to Test:
After completing the above logic, you can test the pipeline using this simple logic below.
public Microsoft.BizTalk.Message.Interop.IBaseMessage
Execute(Microsoft.BizTalk.Component.Interop.IPipelineContext pc,
Microsoft.BizTalk.Message.Interop.IBaseMessage inmsg)
{
XmlDocument xmlDoc = new XmlDocument();
xmlDoc.Load(inmsg.BodyPart.GetOriginalDataStream());
xmlDoc.Save(@"C:\Documents and Settings\uset\Desktop\Output.xml");
xmlDoc.Load(@"C:\Documents and Settings\uset\Desktop\Envelope.xml");
string PMessage = xmlDoc.OuterXml;
byte[] byteArray = Encoding.ASCII.GetBytes( PMessage );
MemoryStream stream = new MemoryStream( byteArray );
inmsg.BodyPart.Data = stream;
xmlDoc.Load(inmsg.BodyPart.GetOriginalDataStream());
xmlDoc.Save(@"C:\Documents and Settings\uset\Desktop\ReturnMsg.xml");
inmsg.BodyPart.Data.Position = 0;
return inmsg;
}
The above codes just replace the received file and send another file to the Biztalk.
Using the Custom Pipeline In the Biztalk:
1) Sign the Pipeline and ensure that the pipeline dll is available in the assembly.
2) In the Biztalk application add the Receive/Send Pipeline shape [ as Designed Pipeline component].
3) Right click the toolbox in the Pipeline Designer and choose items, select pipeline components and select your component.
4) Drag you component to the pipeline.